So far, since I started my "Tribal Themed DIY Extravaganza", I've shared a whimsical DIY: Doily Dream Catcher and a fanciful DIY: Baby Feather Headdress. Today, as I come to the end of my "native" obsessed DIY attempts, I conclude with my biggest tutorial yet; How-To Assemble A No-Sew Teepee! That's right, no sewing needed!! For those who have zero needle-crafting skills like me, these two precious words are music to our ears. A traditional teepee was the preferred tent used by the Plains Indians and have now found their way to the top of almost every child's wish list. I can definitely see why, as they make for the perfect oasis for your infant, toddler and/or school-age child to escape into a magical world of imaginary play or just simply cozy up with a few of their favorite books. The best part about them is how easy they are to set-up and disassemble, allowing for effortless portability. Whether they be used indoor to add a touch of whimsy to your child's nursery, bedroom or playroom or for that perfect outdoor camping spot in the backyard, they are a wonderfully convenient and hassle free way to entertain your little one for hours! I have wanted to add one to my daughter's play area for the longest time just never found the right time to make the big purchase, so I decided to create one myself (with the help of my handyman husband of course). After browsing several tutorials I found they all used the same method to create the structure, however when it came time to fit the covering I decided to do away with dimensions and just use my eye-balling method. ;) With out further ado, here is my step-by-step on How-To Build A NO-Sew Teepee!

Supplies:
Structure:
* (5) - 11/16" X11/16" X 8ft wooden poles
* Twine
* Hand held Drill
* Tape Measure
* Pencil
* Scissors
Covering:
* 9X12 Painter's Canvas Cloth(tarp) (This makes a 4ft-5ft standing area inside Teepee Tent, if you want a higher version, you may want to purchase a larger canvas)
* 10 count Grommet packet with kit
* Boot String bundle
Instructions:
Part I - Structure:
1. Measure and use a pencil to center mark 18" from the top of all your wooden poles
2. Drill a 1/4" hole through each marking on all of your wooden boards
3. String your twine through each hole, tying a knot on each board as you go. (see photo below)
4. Stand your wooden poles up, align the holes and tie with a loose knot
5. Begin spreading the poles out, positioning each one to create your preferred width and height. (You may need to elicit help with this step)
6. Once you have the teepee shape you want, wrap the top of your teepee with twine as many layers as you need to tightly secure.
Part II - Covering:
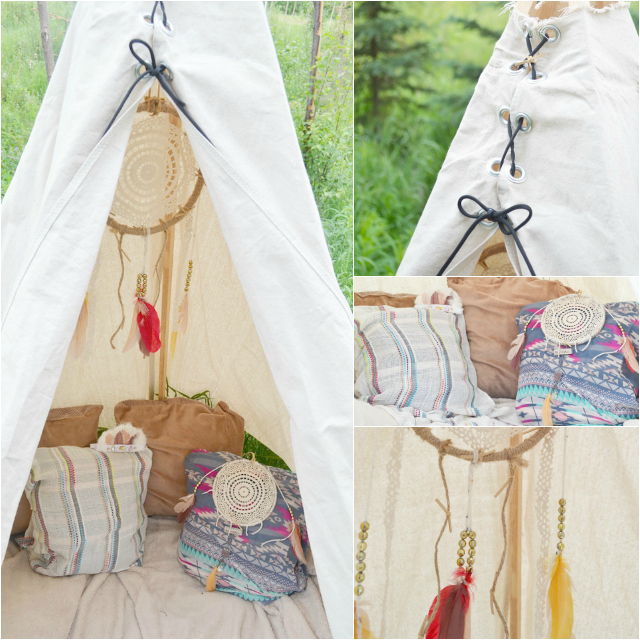
1. Fold your tarp in half giving you a 6ft X 9ft. For the collar portion, measure a 6" radius from from the tip of the folded point and mark a line from left hem to the right hem,cut along that line, creating a collar to fasten around teepee structure (underneath your twine fastening). For the skirt portion of your canvas covering, measure about a 6ft radius from the tip of your corner fold. Mark a line from the folder edge over to the corner of the open corner edge, creating a semi-circle (This will be the bottom skirt of your covering).
++ Side Note: The bottom of the front opening will hike up a little, it may drape as to resemble a shawl collar cardigan. So do not expect the hem to drop all the way to the floor.
If you are not a measuring kind of person, you may simply cut the collar out, as seen in photo directly above. Then follow these steps.
1. (Not Pictured) Wrap your tarp (right side out) around your teepee structure about 6" below your twine fastening. Here you can adjust your height by spreading the legs out for a fuller size or bring in for a more slender/taller teepee.
2. (Not Pictured) Safety pin the opening shut (or have your helper hold) in position while you draw a line around the bottom "skirt"marking your preferred length all the way around.
3. Cut along your marked hem ( I would even cut a bit outside your line as it's always easy to trim or tuck under than it is to add length).
4. Starting at the top of your opening, add 5 grommets on each side.
5.Once your tarp is wrapped around your structure, then string your boot strings through your grommets to secure your closure.
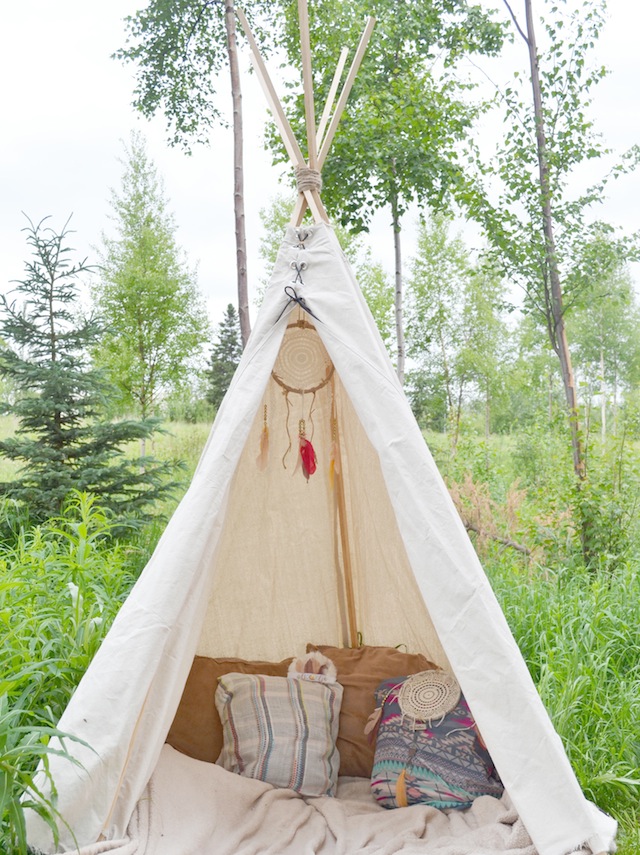
7. Add a cute rug or blanket and lots of pillows for comfy lounging.
YOU DID IT!!
You have now created your very own No Sew Teepee!
Your Beautiful Homemade Hide-Away Awaits You, I MeanYour Precious Little Boy or Girl!
 |
| As you see here, I draped my hemmed opening back and pulled the canvas a bit tighter at the bottom. |
Update:
Since the (above) post we have moved our teepee into my daughter's
nursery! We ended up trimming the top of the teepee down and lowering the twine fastening, just so it didn't overtake the space too much. Here are a few photos of it in her little space :)


