6/28/13

DIY- Baby Feather Headdress

Last week I shared my whimsical DIY: Doily Dream Catcher tutorial and this week I am carrying on the tribal theme with a "how-to" on creating a feather headdress for your baby girl or boy (just change up colors/embellishments). For this adorable DIY attempt, I turned to the AMAZING Kelly Murray! She is not only a mommy and wife, she is a very talented illustrator from San Diego and now head designer of Jedidiah Clothing Company. You may recognize her name, as I re-posted her daughter's charming nursery that I used as inspiration when coming up with a general theme for my daughter, McKenzie's nursery. Thank goodness, she is still able to find the time in her wonderfully busy schedule to share her amazing DIY tutorials.  Lucky for me, she was my first stop while searching for an easy tutorial on how to assemble a feather headdress small enough to fit my eight month old. So hear you go, I hope you find it easy and enjoyable!
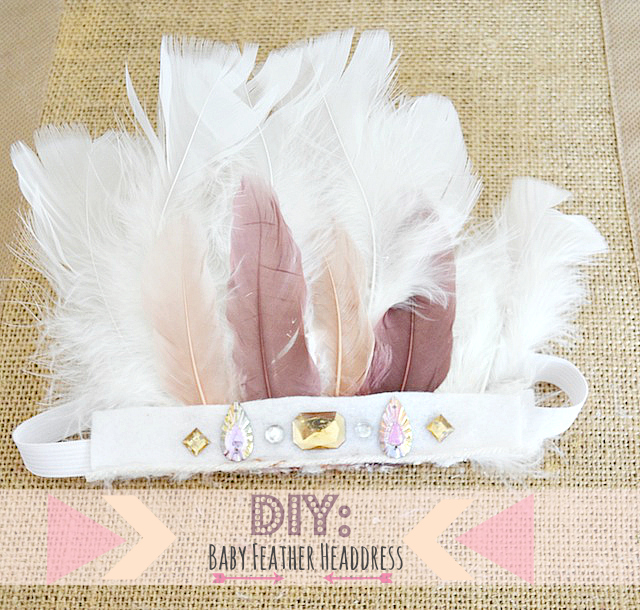
DIY: Baby Feather Headdress Tutorial

Supplies:
  • Needle and thread
  • Elastic - I measured McKenzie's head, cut accordingly and hand stitched the ends together. Elastic is available in several colors and can be purchased at your local craft store.
  • Large Feathers- color of your choosing
  • Small accent feathers - color of your choosing
  • Felt - I cut into two strips. I chose same color as my elastic
  • Embellishments of your choosing
  • Hot glue gun
How To:
  1. I started by simply lining up my smaller accent feathers to length I wanted then glued onto one strip of felt
  2. I lined up my larger feathers, then glued the felt (containing the smaller accent feathers) on top,  creating a front row and back row :)
  3. After allowing the feathered felt strip to dry, I centered and glued my feathered felt strip onto the front side of my elastic.
  4. I attached another strip of felt on the opposite(back) side to clean it up a bit and to add a bit of extra comfort.
  5. I then clipped the ends of the feather stems that peaked out at the bottom
  6. Lastly, I decorated the front of the felt strip with embellishments and let dry. 
>>> Depending on your preferred height, you may want to trim the feathers off the top after trying on <<<

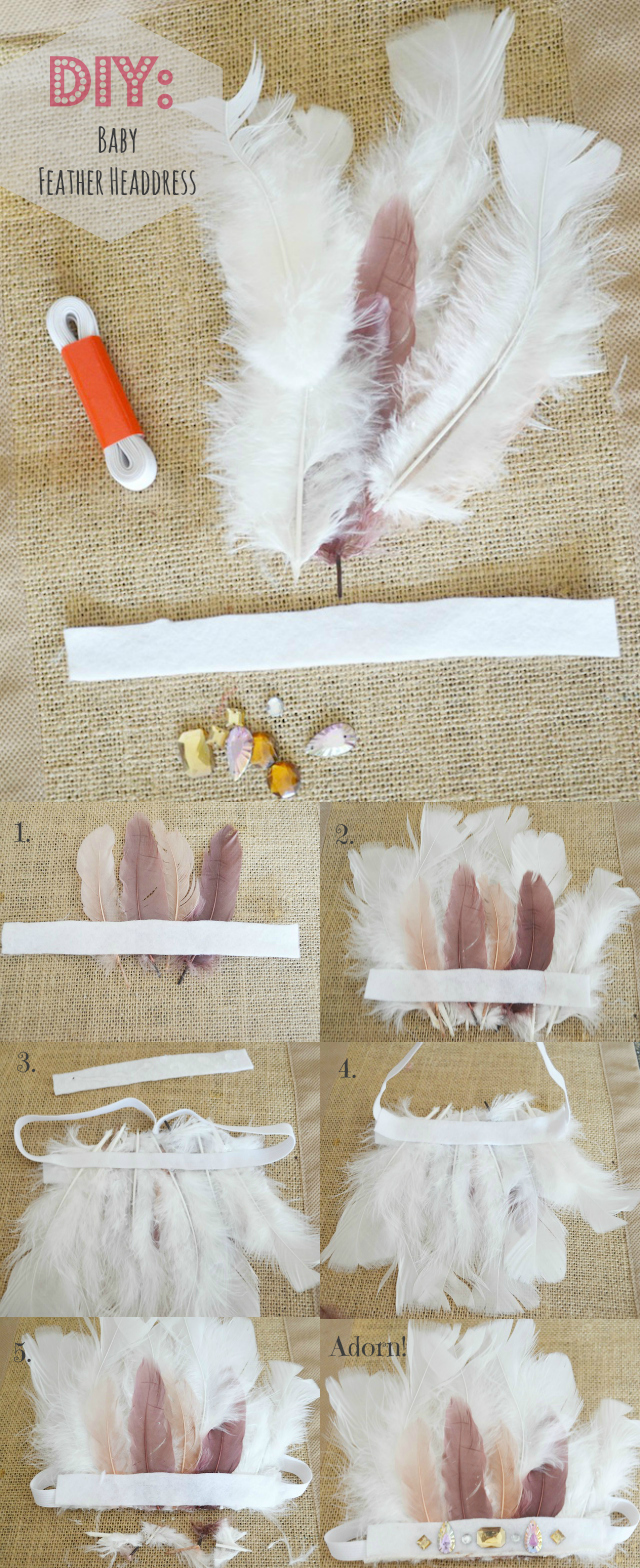
{Note: Please do not leave your baby alone or lay your baby down for a nap wearing any type of jewelry or accessory such as the item featured today}

6/26/13

Sweet Family Of Three Photo Session By Lauren Ristow Photography

Boy do I have a beautiful outdoor family session to share with you today!! Arizona based, Lauren Ristow, talented photographer and owner of Lauren Ristow Photography beautifully captured this gorgeous family of three. An open field, a cozy quilt, a few props and natural light is all Lauren needed to perfectly document precious Keshlyn's eight-month milestone! The oversized balls of yarn had me at "hello"! What a perfect touch to subtly tie in the color theme of the day, purple! With Keshlyn's heavenly smiles and her mommy and daddy's sweet embraces, you can just feel the love and joy that make up the essence of this delightful family. 


Isn't baby Keshlyn a doll?


To see more of Lauren's stunning photography, feel free to follow her work on Facebook and Pinterest!

6/24/13

Enchanted Garden Maternity Session By Brandi Smyth Photography

Good Monday Morning Fawn Fans!! Today I have a BEAUTIFUL maternity session by the ever-so lovely and talented photographer, Brandi Smyth. Brandi is no stranger to Fawn Over Baby, as her dreamy Vintage Mother/Daughter session was featured this past April and has since created a HUGE buzz among the inspirational photography community. Brandi is known for creating custom themed photo sessions that produce a soft and serene quality that stands the test of time. Today's "Enchanted Garden" themed maternity session does just that. Gorgeous parents-to-be Nikie and Chris are stunning as they gracefully document their pregnancy surrounded by a beautiful lush forest. I am swooning over this flawlessly fanciful maternity session that radiates enchantment and charm.  I hope this beautiful Brandi Smyth capture will delight your day time and time again as I know it will mine.

6/21/13

DIY: Doily Dream Catcher

Hello My Dears! Today I am sharing one of my many DIY projects that I have been working on this past week. With the tribal theme taking over my collection of inspirational designs and photos that are neatly filed away on my computer, I couldn't help but jump on the bandwagon and start incorporating it into my daughter's sleep and play area. Since McKenzie does not have a mobile anywhere in her nursery, I decided to start off my DIY extravaganza with a Dream Catcher. Dream Catchers originated in traditional indian beliefs and were hung above one's bed(mostly children) to protect them from bad dreams.  There are a ton of wonderful Dream Catcher tutorials out there, however a lot of  them include the very cool webbing technique that is threaded through the center. If you are like me and don't have the time to learn how-to web, many DIYers are using doilies! What a genius idea right? After searching and searching, I came across this awesome tutorial from Calico Skies and in an instant this overwhelming diy-confidence came over me and I dove right in! Here is how I assembled mine with a little help from Lauren at Calico Skies of course.

Supplies:
  • Doily -  Smaller size is preferred. I found mine in a vintage cream color at JoAnn's. If only whit is available, see Lauren's tutorial
  • Craft Hoop - Metal is preferred, however, all I could find were the wooden embroidery hoops at JoAnn's (you get to make two out of these)
  • Yarn or twine - I used a natural looking yarn for one and twine for the other.
  • Beads - color and shape of your liking. Make sure the hole is big enough to fit yarn, twine or leather cord through.
  • Leather cord - I went with a lighter shade. 
  • Feathers - can be bought packaged or individually at JoAnn's and Michaels
How To:
  1. I started by simply wrapping the yarn tightly around one of the wooden hoops-tying at the end
  2. I then created my hanger by tying a loop knot with yarn or leather cord at the top
  3. I had to cut the trim off of my doily as it was too large for my hoop. 
  4. I placed the doily in the center of the hoop and began stretching and tying four outside edges of the doily to the loop. (I just left the extra tails from the knots to create a more frilly look.
  5. I then tied and hung leather strips, twine and yarn from the sides and bottom of the loop and attached beads and feathers or any other embellishments of your choosing(The more, the merrier)
  6. Voila! You are now ready to hang your dream catcher anywhere your heart desires. 


If you do not have the time or interest in making your own, visit Moons & Junes on Etsy. Shop owner and talented mom, Shayla, makes and sells amazing dream catchers as well as beautiful mobiles to adorn your child's nursery or bedroom!

6/20/13

Thursday's Mom Lovin' Blog Hop

Welcome to Joyful Life's 4th Mom-Lovin' Blog Hop! I am honored and delighted to be co-hosting along with Host, Hannah from Joyful Life and Co-host Lena from Root and Blossom.

Starting off the Mom-Lovin' Weekly feature is Rachel from You can't google everything. She shares her first time mommy experiences that we can ALL relate to as well as several wonderful blog hops that she co-hosts each week. Be sure to visit Rachel and say "Hello"


Grab a Mom-Lovin' Button And Spread The Word!
Joyful Life: Diapers and Decoupage

6/18/13

Bohemian Style Family Session By Lauren Pollard Photography

Hello Fawn Fans! Do I have a fantastic photo session for you today from the insanely talented photographer Lauren Pollard Photography! Based out of Southern California, Lauren is passionate about capturing her clients in a unique way allowing for their style and personality to shine through. Lauren explains, "To me, photography is an art observation. It's about finding something interesting in an ordinary place. I've found it has little to do with the things you see and everything to do with the way you see them." 
Today, I am sharing Lauren's bohemian style Family/Maternity photo session that will leave you fawning over everything about this feature. I fell head over heels in love with this beautiful family's nostalgic vibe and every detail that Lauren incorporated into making this session stand out. When mom, Valerie, mentioned to Lauren that she wanted to incorporate a VW bus, Lauren felt inspired to pack up almost her entire bedroom and create this beautiful bohemian stage fit for a gorgeous family of 3.5! With baby Lennox on the way, Valerie, Ryan and their adorable little lady Sawyer are having a family outing that will be an inspiration to family/maternity photographers everywhere! With out further ado, enjoy this brilliantly designed Family/Maternity session from Lauren Pollard Photography!


Thank you Lauren for allowing me to share this exceptional family photo session!


Related Posts Plugin for WordPress, Blogger...

Blog Design by Get Polished